A couple of weeks ago, I wrote about how I got a chainring tattoo and that I was going to switch to waxing my chain. In that post, I mentioned the small performance gains from waxing a chain, but also about the benefit of no more oily hands or ‘tattoos’.
Today, I actually waxed my chain. The process is quite strait forward. The critical part, is to make sure that the chain is thoroughly clean, before waxing.
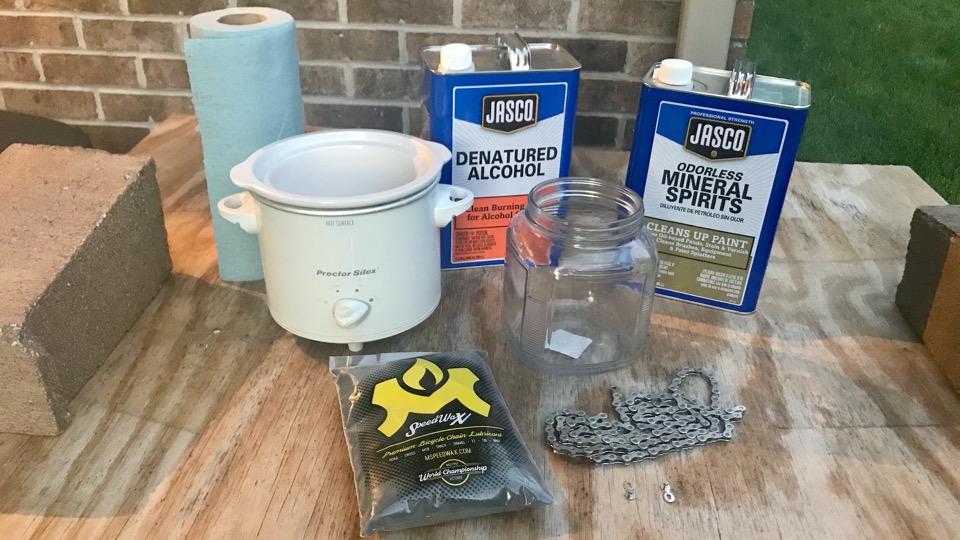
I started with a new chain, because they are easier to clean. You wash the chain in two different solvents until all oil is removed. First you wash in mineral spirits and then in denatured alcohol. You check for cleanliness, by wiping the chain with a cloth after removal from the solvent. When the cloth comes up totally oil free, your chain is clean.
The final step is dipping the chain in hot molten wax and swishing it around. I am using Molten Speedwax, which has excellent reviews, but some people use just plain paraffin wax. When thoroughly wetted out, you remove the chain and hang it up for the wax to cool down and harden. You clean and wax a quick link too.
The final step, which I will do tomorrow, is the flex each link to ‘break’ the solidified wax. Then it’s onto the bike with the chain and away we go for a ride.
The waxed chain lasts about 300 miles, before it needs re-waxing, which isn’t a lot. The good news is, that you don’t have to clean the chain again, to re-wax it; you just dip it in the hot wax again. To make the process even easier, most people have multiple chains and wax them in batches. Then, when the 300 miles is up, it is just a quick process to remove one chain and put on a freshly waxed one.
I know this sounds like a lot of work, but it really isn’t. This was first time doing it for me and it didn’t take long. I’m sure I will also get quicker at it, over time. Now, I just have to see how it all works out on the bike.