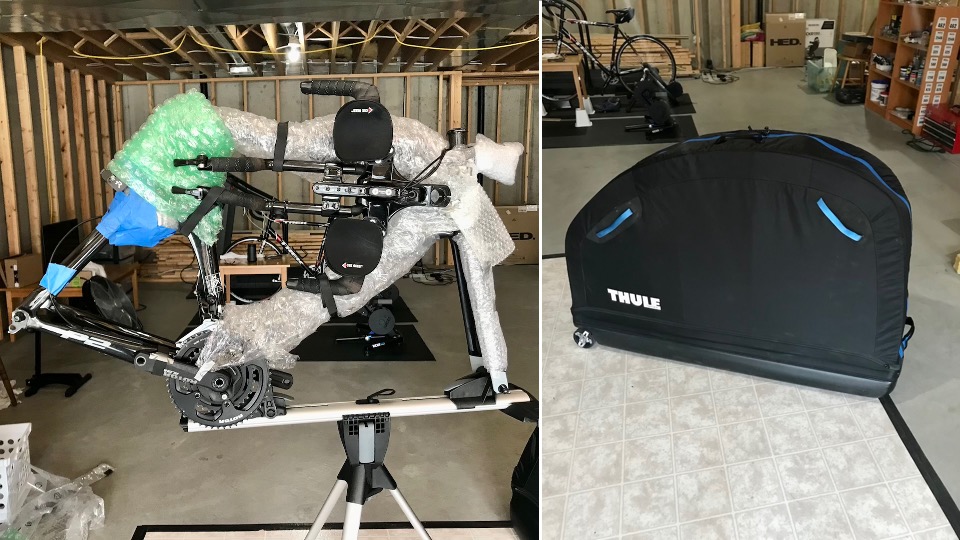
There is something special about a destination race in some far away place. These races are typically ‘bucket list’ events, but if it’s a triathlon, they represent a challenge. You need a bike to race, and transporting bikes is not easy or not cheap.
You have basically three options:
- Pay someone to ship your bike to the race. This method is the simplest, but typically, by far the most expensive.
- Use a bike box and fly to your destination with your bike as luggage. This option is lower cost, but you need the confidence to pack and unpack your bike. You also rely on the airlines and airport staff to do their job too….
- Rent or borrow a bike at the destination. Not a bad option if you can get a bike that matches your own, but that is very unlikely.
I use option number 2 and I fly with my bike. I packed mine for Oceanside today. The process sounds complicated but it isn’t that bad. These are dozens of YouTube videos about it. Here are the basics of the process.
- Remove pedals
- Mark seat post height (so you can put it back in the exact same place) and remove seat.
- Remove cockpit from the fork stem, and fold it back parallel to the frame (see photo above). Secure the fork in place with spacers. Use lots of bubble wrap to prevent damage and scratches to the paintwork.
- Remove derailleur, wrap in a bag / bubble wrap, and tape it between the seat stays. I also remove my chain via the quick link, but you can leave your chain on the bike.
- Secure your crank to the chain stay. I use Velcro tape.
- Insert a protective skewer into the rear dropouts to prevent the stays moving. I use a skewer with Nylon washers.
That is pretty much it. The first time you do it, it takes a while, but you quickly get faster at it. If you do it regularly, it takes less than an hour.
So there you have it; your various options for transporting bikes.


